Open edX and cielo24
Learn how to configure your Open edX account so you are ready to order cielo24 captions. Complete the steps below.
Getting Started
1. Under Course Video Settings > Automated Transcripts, select cielo24.
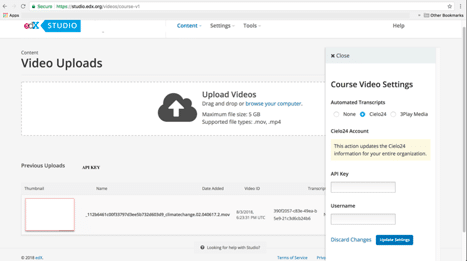
2. In the API Key and Username fields, enter the appropriate credentials provided to you by cielo24.
3. Select Update Settings.

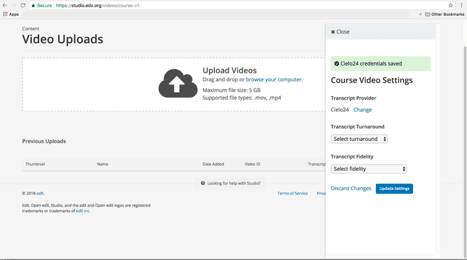
Enabling Course Video Settings
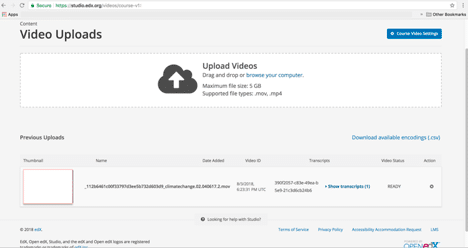
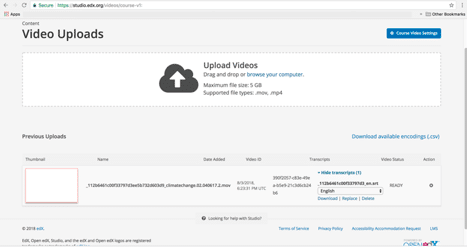
1. Open your course in Studio, and then select Video Uploads on the Content Menu.
2. On the Video Uploads page, locate and select Course Video Settings.
3. In the Course Video Settings panel, specify the settings for your organization.
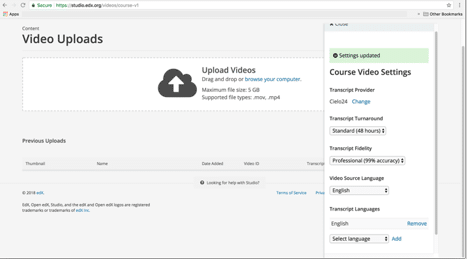
4. For cielo24, select the options that you want in the Transcript Turnaround and Transcript Fidelity fields.
5. Select Update Settings.
Adding Video Files
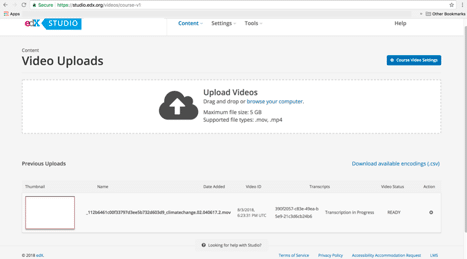
1. You can add video files to be uploaded by dragging and dropping files to the page, or selecting Browse Your Computer to locate the files to upload.
2. A rectangular tile appears on the page for each file and shows the following information:
- The video file name.
- A progress bar.
- The status of the file upload process.

Optional Thumbnail Image
The thumbnail image is the image that learners see before the video begins to play.
1. To add a Thumbnail Image: Hover the cursor over Add Thumbnail, select an image from your computer, and then select Open.
2. To change a Thumbnail Image: Hover the cursor over the image, select Edit Thumbnail, select an image from your computer, and then select Open.
After you have uploaded video files, the edX video process begins. You can check the progress of a video file through the service at any time.
Once the transcripts have been returned, select Show Transcripts and you will be given an option to download your transcript. You will also have the option to replace the transcript with another desired version.
Please talk to your cielo24 representative to get your integration configured today!